

Current installation method
The current source repository provides a direct dom0 installer at install/install.sh. There is no finished public one-command bootstrap. Review the exact checkout and the complete installer before running it in dom0.
The installer expects the supported Qubes OS baseline and its command dependencies to exist already. It directly references debian-13-minimal and whonix-gateway-18, so those TemplateVM names must exist.
From the reviewed checkout in dom0:
cd /home/user/kuhbs-for-qubes
bash install/install.sh
The installer makes system-wide changes. In particular, it:
- replaces KUHBS-owned Gedit and XFCE Terminal settings;
- disables prewarmed DisposableVMs and changes the default DispVM;
- sets
vm-poolrevision retention to zero; - installs the Python package, schemas, defaults, icons, GUI, CLI, and shell completion; and
- creates empty KUHBS catalog directories.
Its package-install and TemplateVM-install commands are currently comments. It installs no KUHB catalog and no i3 integration. Those are separate repositories.
Open KUHBS
Open KUHBS from the application menu, or start it from a dom0 terminal:
kuhbs gui
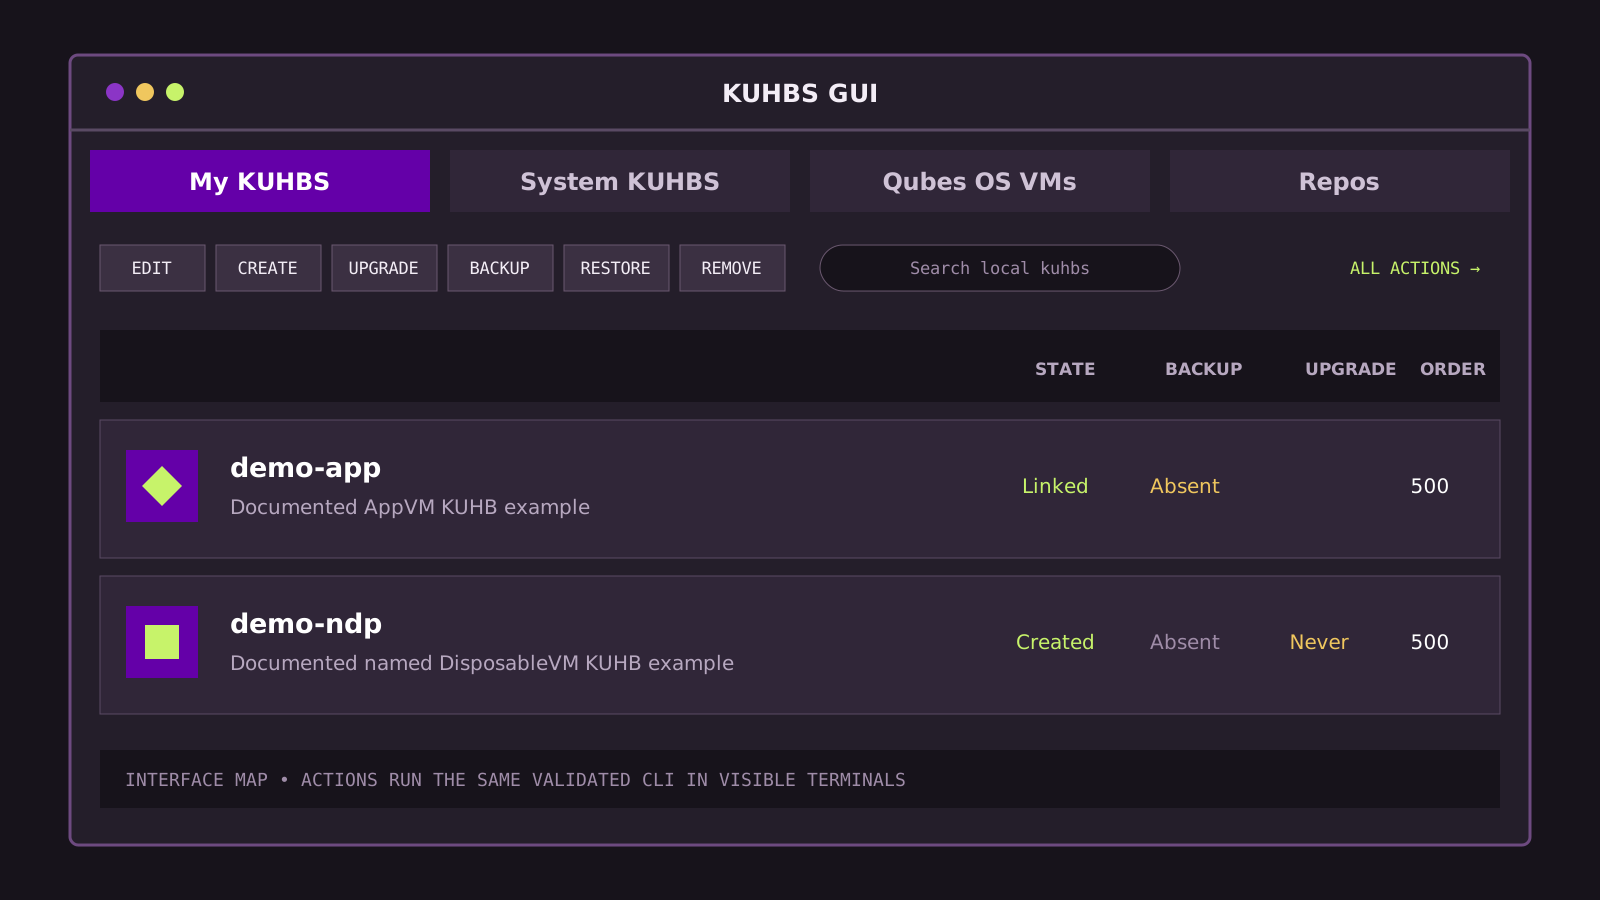
The GUI has four tabs:
My KUHBS— enabled definitions with orders100–1000.System KUHBS— enabled definitions with orders1–99; this is an order category, not a built-in catalog.Qubes OS VMs— dom0 and the external base TemplateVMs referenced by enabled definitions.Repos— installed Git catalogs and definitions that can be enabled or disabled.
The GUI starts fresh CLI commands in visible terminals. Those commands validate current configuration again before changing Qubes OS.
Add and create your first app
- Independently audit the repository and exact commit you intend to use.
- Open
Reposand chooseAdd repo. - In the temporary repository DisposableVM, select the full commit ID you already audited. The Add flow lists commits; it does not display a complete code review for you.
- Select the definition and click
Enable. Enable creates an active symlink; it does not create VMs. - Run
kuhbs check, then openMy KUHBS, select the card, and clickCreate. - If the definition contains launchers, open them from the normal application menu. Service-only definitions may have no application launcher.
Create builds only the VMs and launchers declared by that KUHB. It refuses to mix existing target VMs with new ones, so it is not a repair command. If Create fails, inspect the visible terminal, fix the cause, remove the failed KUHB resources when appropriate, and create it again.
For normal web browsing, the separate application catalog provides Surf, whose launchers start fresh unnamed DisposableVM sessions. Keep required website addresses and credentials in KeePassXC rather than preserving a browser profile.
Migrating from an older system? Create the persistent destinations first, then import selected application data manually .
Next: How KUHBS Works .